STEP 4: Connecting Solar Inverters
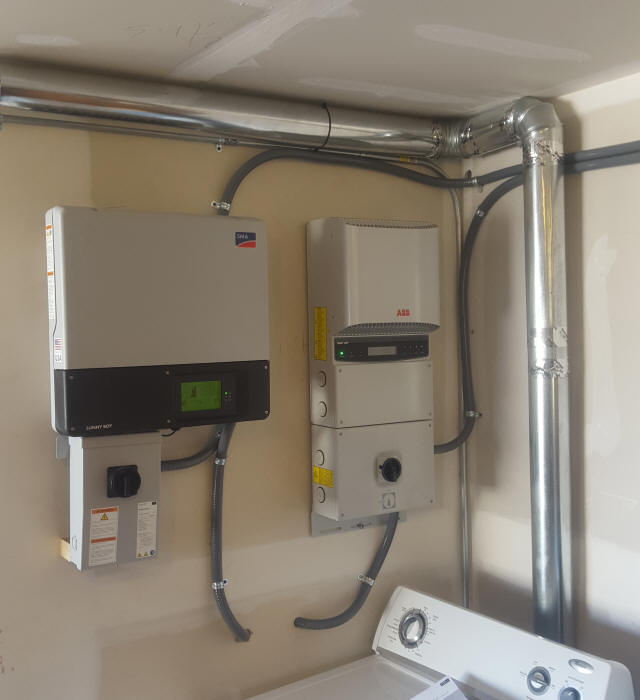
Many solar inverters are rated for outdoor installation however we chose to install ours in the basement garage. We were able to get the wires to the basement very easily using a 4" conduit we installed between the attic and mechanical room when we built the cabin. From the mechanical room we ran a 3/4" flex conduit to each inverter. From each inverter we ran another 3/4" flex conduit into the breaker panel which is located on the opposite side of the wall the inverters are mounted on.
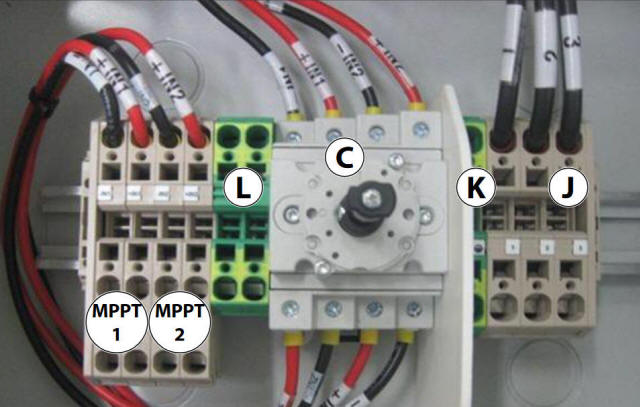
Breakers should be sized as you normally would based on the wire size running between the inverters and breaker panel. In the case of 10AWG a 30A breaker is required. The picture below showing the terminal block for the PVI-3.6-TL-OUTD solar inverter. 'C' is the DC disconnect switch. MPPT 1 is for the positive and negative wires from solar string 1, MPPT 2 is for solar string 2. 'L' is where you tie the grounds from solar array 1 and 2. 'K' is for AC main ground. 'J' is used for AC grid output terminals (1 and 2 tie to Leg 1 and Leg 2 of a 240V split phase breaker panel which you'd have in the U.S., 3 ties to Neutral in the breaker panel). Its pretty straightforward. Each solar inverter is a little different but the wiring will be the same basic idea. DC comes into the inverter, AC goes out to the grid.
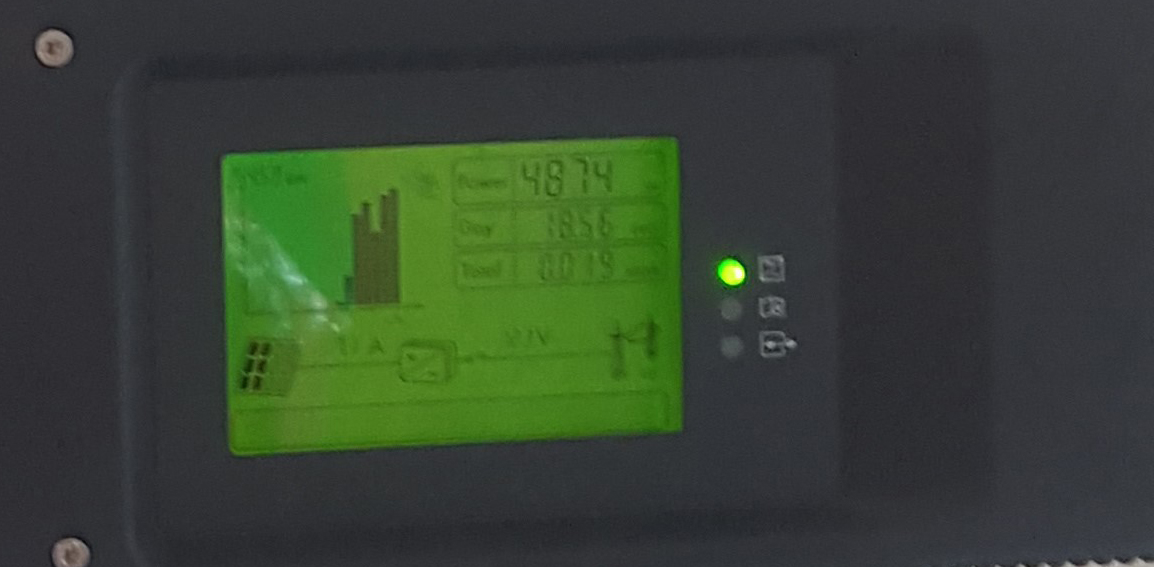
The image above shows our SMA inverter when we first kicked it on, 4874 Watts. There are a couple menus but it tracks KWh produced for the day and total MWh produced since the inverter was put into use.
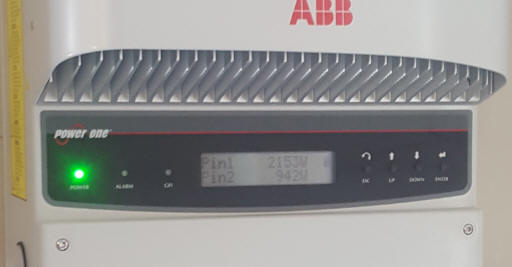
The picture above shows our ABB solar inverter when it was first turned on. There are several menus to select between but this one shows one solar string producing 2153W and the other 942W. The difference in power comes from that fact one of the solar arrays has only 6 panels and the other 13 panels.
It was quite interesting to watch the production of power at first and notice how much it drops when clouds come by and then see it immediately ramp back up with full sun. With full sun the larger inverter was putting out over 6KW and the smaller inverter over 4KW, just what we expected.
One thing to keep in mind if you turn on your inverters to test things out prior to the power company installing the new Net Meter, you won't damage anything but the standard meter only turns one direction so you won't get any credit for excess power you produce. I was told you will actually get charged for the extra power you are producing as the meter can't tell the difference and ends up counting the KWh's you send to the grid the same as it counts KWh's coming into the house. It's probably best to give it a quick check and then wait until you get the Net Meter installed.
Installing your own solar inverters is something a lot of folks are hesitant to do, especially if you don't have a lot of electrical experience. I actually thought there might be more to it but in reality if you understand wiring an electric dryer you can wire one of these in. Assuming you pull a permit with the city and have the inspector check things off in the end there is nothing terribly difficult to doing it yourself.
Update: Fall 2017
After our first full year of having the solar panels installed we produced more energy in total than we used at the cabin (approx . 2,000 KWh in the positive). Our cabin gets rented and used most heavily in July and August and with the A/C demands peaking at the same time those months were negative but then in the Spring and Fall the system was very much in the positive. Overall, we've been very happy with this solar setup and have not had any problems with it. Let the sun keep shining.
STEP 1: Solar Power - Do the numbers make sense?
STEP 2: Designing Your Own Solar Power System
STEP 3: Installing Solar Panels on Metal Roof
STEP 4: Connecting Solar Inverters