How to a Wire Stove
The first step in how to wire a stove is to make
sure you have the proper electrical service. Typically stoves require a dedicated
50-amp, 240-volt breaker. The wire supplying power from the
breaker panel to your range outlet will usually be a 6/3 Romex
cable (Blk wire- hot, Red wire - hot, White wire - neutral, Bare
copper wire - ground).
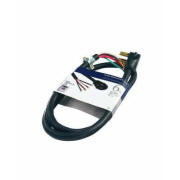
New stoves do not come with a power cord.
That's because until recently, homes were wired with two different
receptacle styles: 3-prong and 4-prong. Knowing that
homes had a variety of outlet types, it didn't make sense for
appliance manufactures to pre-wire the stove with one or the other.
The 4-prong plug adds a safety ground wire in addition to the two
hots and neutral found on the 3-prong plug. Below are pictures of
both a 3-prong and 4-prong style plug with respective labeling.
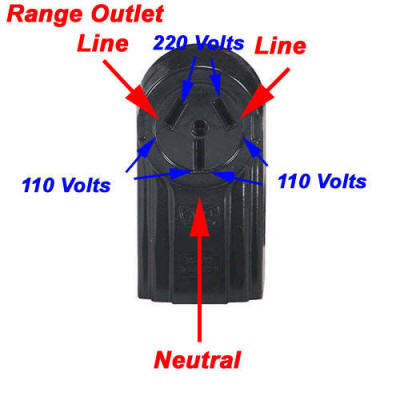
With a voltmeter you can check for proper voltage on the wall outlet
before deciding how to wire your stove. If the existing
receptacle is 3-prong, you can purchase a 3-prong cord for your new
stove. Converting to a newer 4-prong receptacle isn't a bad
idea, especially if a ground wire is already running to the
receptacle box. These does take a little more work and if you
aren't familiar with electrical wiring you may not want to attempt
it. You should measure
220-240VAC between hots, and half of that voltage if you measure
between either of the hots to neutral.

Instructions for How to wire a New Stove:
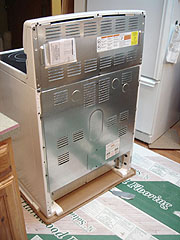 |
Back side of range.
|
|
Remove 1/4" screw to open cover
panel.
|

|
|
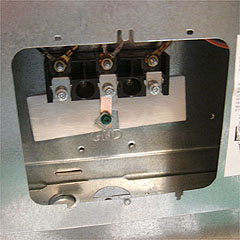 |
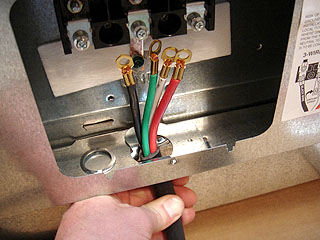
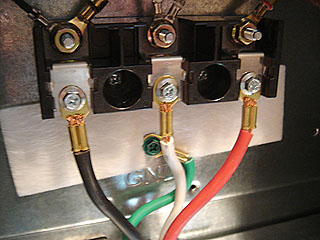
Behind the cover panel there was a
row of three electrical connector screws, plus a
green ground screw.
The middle connection is neutral, the left
and right connections are hot. This
arrangement is common on 240-volt appliances.
Like many appliances, this stove has a metal
enclosure for the electrical connections. This is
like a built-in "junction box".
|
|
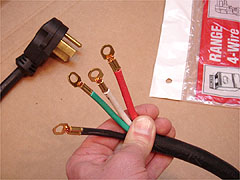
By now you should have
determined how to wire your stove
(3 prong or 4 prong) and you have purchased the
plug/cord. You can reuse the cord from your
previous stove if you like.
A 4-wire range cord can be
purchased at Home
Depot for $15-$20. |
 |
|
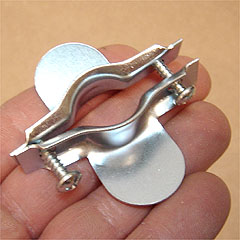 This is called a "strain relief".
The purpose of this device is to grab onto the outer
jacket of the cord to prevent the individual wires
from being pulled loose if somebody should pull on
the power cord. This is called a "strain relief".
The purpose of this device is to grab onto the outer
jacket of the cord to prevent the individual wires
from being pulled loose if somebody should pull on
the power cord.
|
|
|
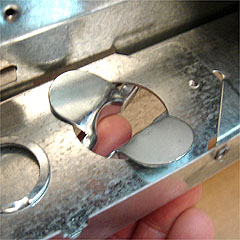
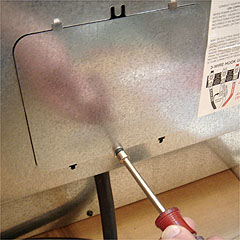
| With one screw left out, place
the strain relief into the hole in for the power
cord. |
 |
|
 |
Thread the 4-wire power cord up
into the connection "box". |
|
Note that the red and black wires are "hot" wires. There is 240
volts of electrical potential between the two hot wires, and 120
volts between either hot wire and the white neutral wire. Green is
ground.
Only For
4-Wire Cords:
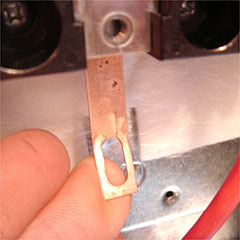
Following the instructions on the back of the
stove, I removed this copper bonding strip
that connects the neutral line to the ground screw.
This is similar to how you wire a stove with
3-wire cords except for you would leave the bonding
strip in place. The bonding strip ties the
chassis of the stove to neutral which you need for
safety if you don't have the separate safety ground
that comes with the 4-wire cord.
|
 |
|
History of 3-wire vs. 4-wire
range wiring:
In all houses the neutral wire and the ground
wires are connected together... but ONLY at
the main panel.
Not long ago houses were being built with a
3-prong range receptacle, while mobile homes were
required to have a 4-prong receptacle. The 4-prong
receptacle has a separate prong for the ground wire,
the 3-prong receptacle either didn't use the ground,
or the ground was tied together with the neutral.
With the 1996 National Electrical Code revision
they stopped allowing this loophole in an otherwise
sensible wiring system. Now all ranges (and electric
dryers) must be wired with a 4-prong outlet.
|
|
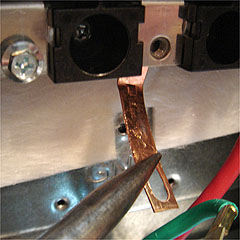 |
It may be difficult to remove this
bonding strip but stay with it. |
|
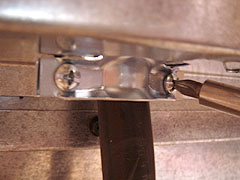
| Connect one of the hot
wires (to hold it in place), then connect the ground
wire to the grounding screw.
|
 |
|
 |
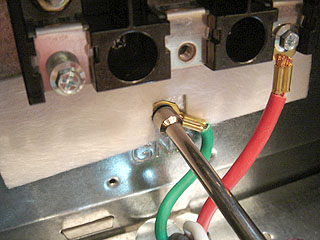
Connect the neutral (white)
wire and the other hot wire (black).
These connector screws need to be tightened
firmly. A loose screw will create a high
resistance point in the circuit and can cause arcing
and other issues with your appliance.
|
|
| Install the other screw in the
strain relief, and tighten it until the cable is
held securely but not crushed. |
 |
|
| Install the cover panel. |
 |
|
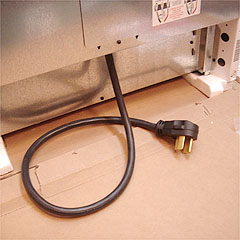 |
The completed cord installation.
Note the recessed area at the bottom of
the back of the stove. This recess provides a place
for the range cord to lay when the stove is pushed
tight against the wall.
|
|
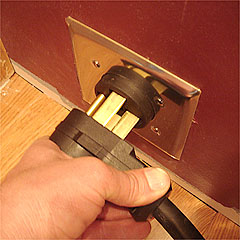
| Plug in the range. It should take quite
a push to get the plug into the receptacle. |
 |
|
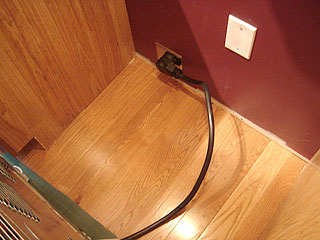 |
When you plug in the range, the cord
should go sideways and fit into the recess at the
back of the stove. |
|
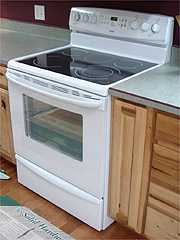
| Once the stove is pushed back
against the wall, turn on the breaker and
test the stove. That concludes the task of how
to wire a stove. |
 |
|
Built-In Ovens, Cooktops, and
Ranges:
These units cannot use a plug and
receptacle. They must be hard-wired using
flexible conduit between the J-box and appliance.
The J-box needs to be accessible, such as in
an adjacent cabinet or behind a drawer.
|
|
Back to Wiring Diagrams Home