Wooden Floor Framing
The weather didn't cooperate very much for the wooden floor framing of our cabin. It rained almost the entire week, the building lot was a clay muddy mess and our temporary power kept tripping. In the end however, we persevered and were able to complete our wood floor framing in just a couple days.
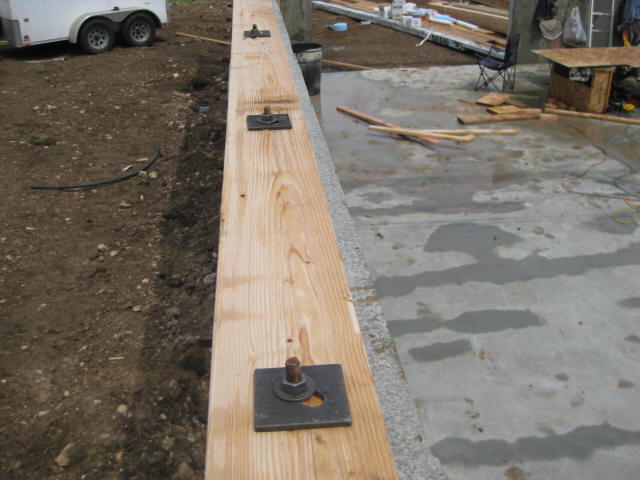
Sill Plates are bolted to the top of the foundation before the wooden floor is put on. J-bolts are installed in the foundation when it is poured and then we used a metal plate with washer and nut and shown above to secure the sill plates to the foundation. We ended up using an impact driver to snug down the nuts.
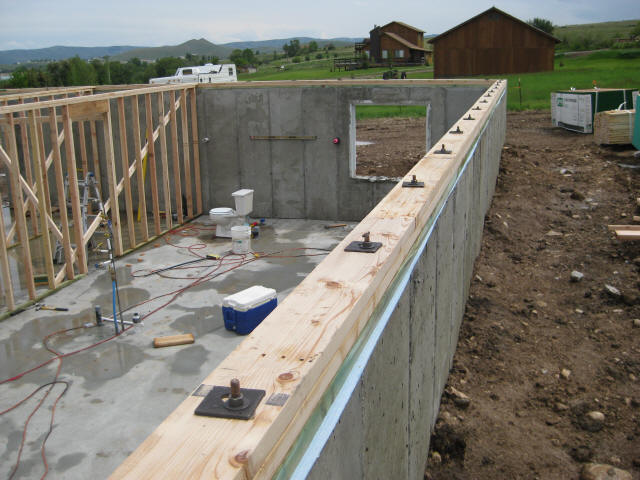
We decided to stack three 2x6s for plates because we wanted to pick up a little extra headroom in the basement/garage. Typically you would only put down the first plate. You'll want to roll out 6" wide blue foam between the first plate (treated lumber) and the foundation. This corrects for inconsistencies in the top of the foundation and provides a good seal.
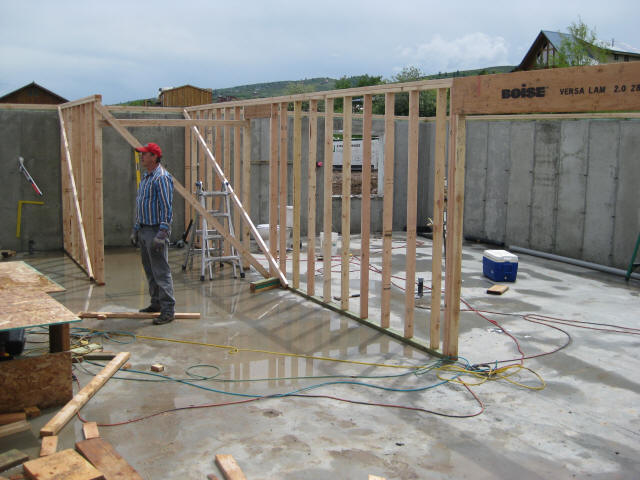
The next step was to build the load-bearing wall in the basement that will support the joists. This wall is on top of the footing that ran all the way across the floor and supports the joists so they only have around a 20' span. We made a change of plans on the fly to add the beam shown in this photo. This allowed us to make one of the garage bays double deep and can always be changed into a normal wall down the road.
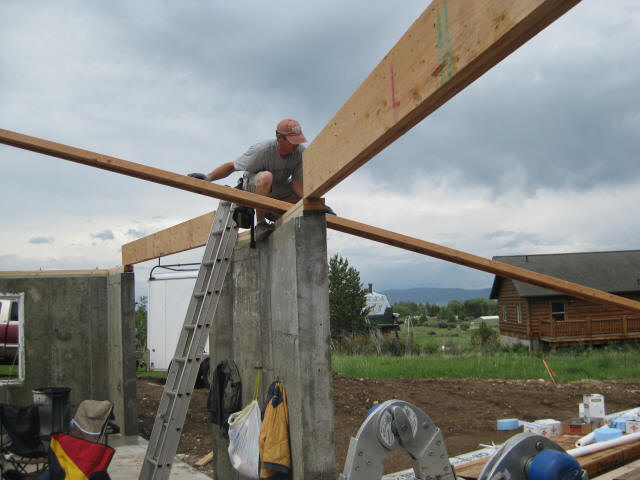
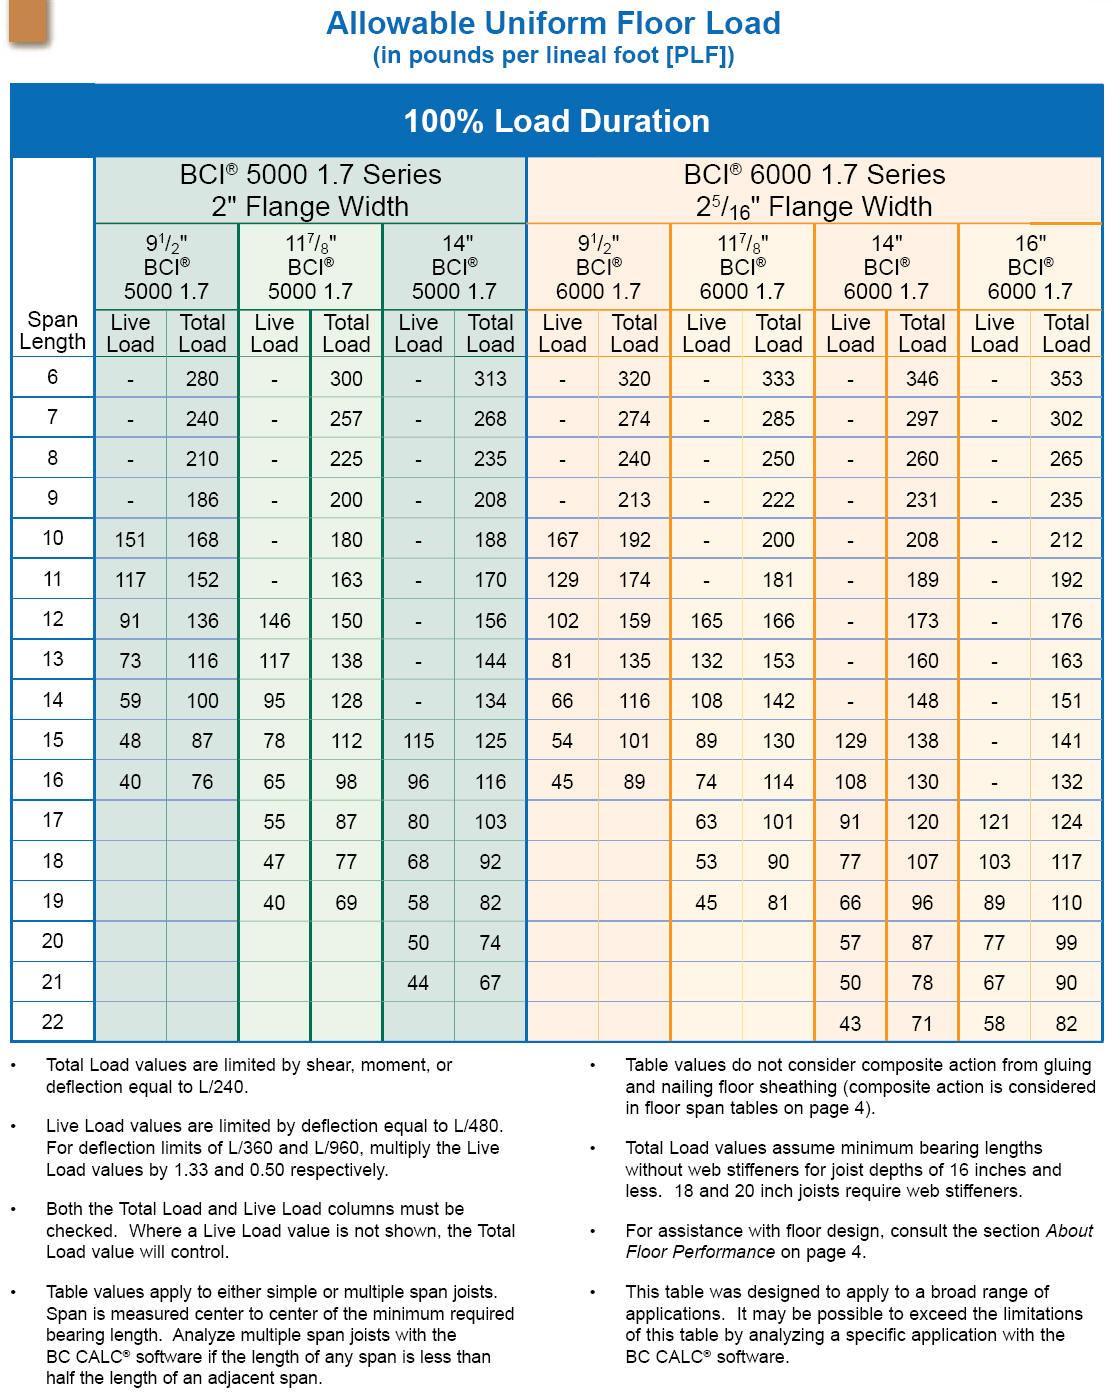
Microllam or Versa-lam LVL beams were also placed over each of the garage door openings to support the floor joists. The tables below outline design values for Boise Cascade Versa-Lam beams.


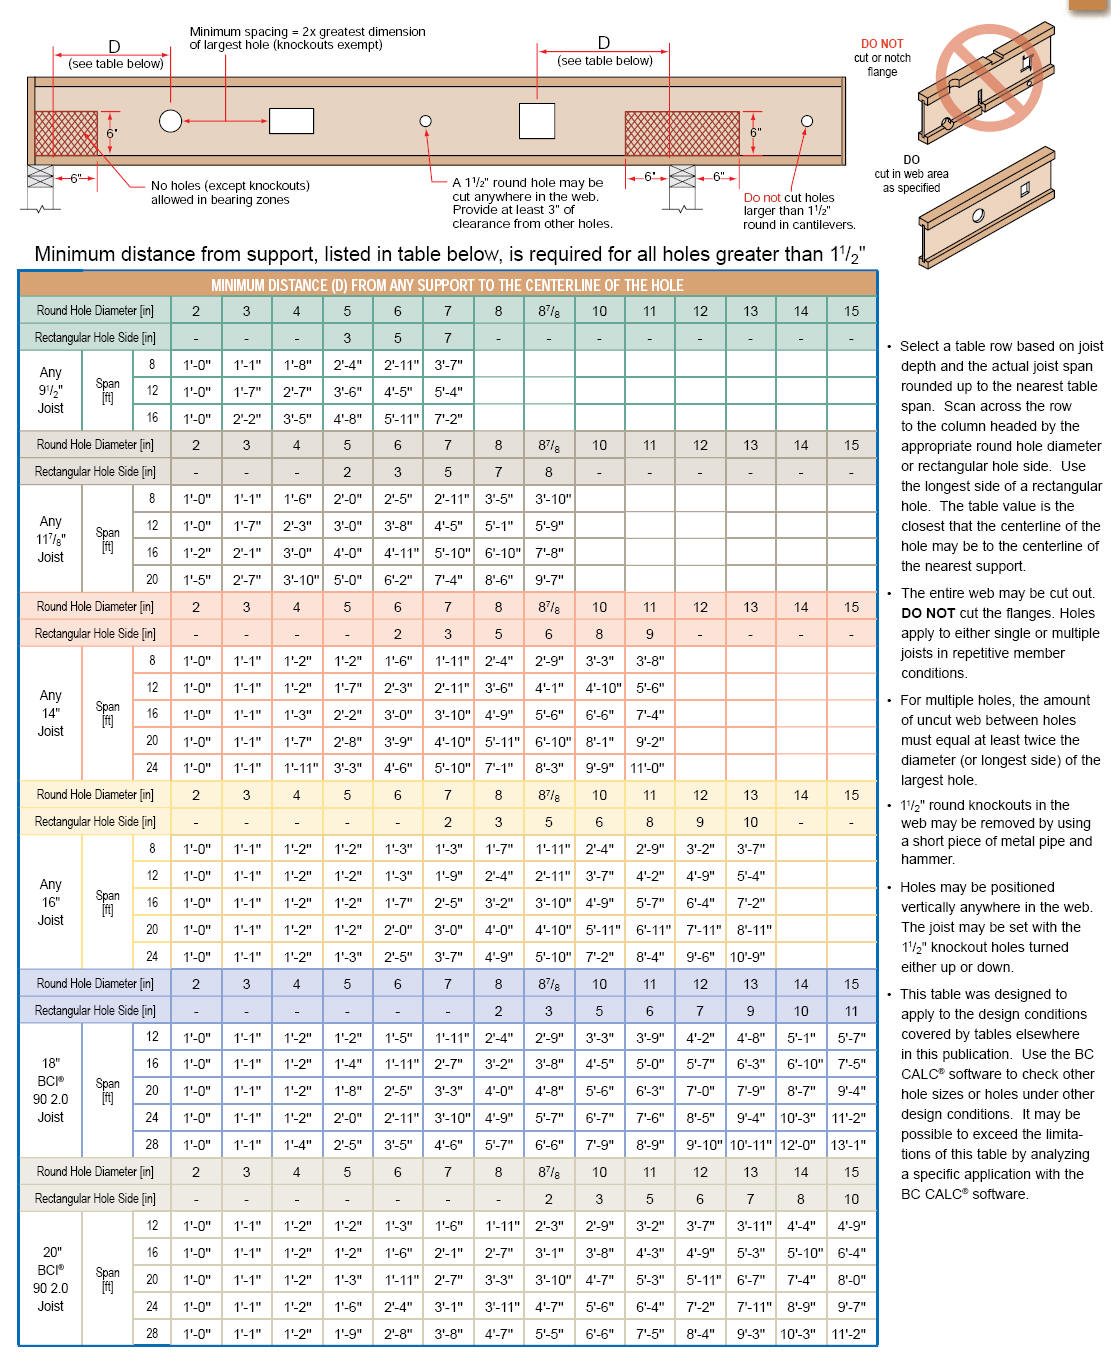
You might come across an instance where you need to drill holes through the beam. Here are the specs that you should follow for that:
![]()
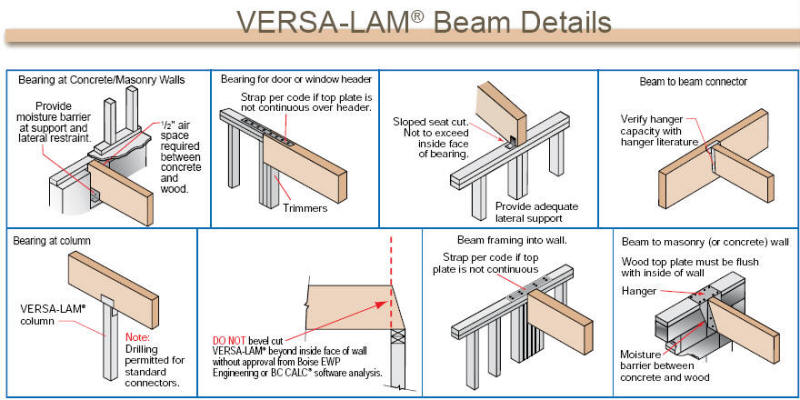
Here are some Do's and Do Not's when it comes to installing beams.
Once the sill plates and bearing walls are in place, your wooden floor framing will really start to move along quickly.

Some of the first joists going into place. These were BCI 6000 1.7, 11 7/8" floor joists made by Boise Cascade. The I-joist are spaced 16" apart on-center "O.C." Be sure to check your blueprints however for specified joist spacing. Engineered I-joists can be spaced on centers of 12 in, 16in, 19.2in, or 24in depending on load requirements for your floor. The charts below show sizing information for wooden floor joists:


The diagrams below show some of the methods for end bearing when framing your wooden floor. The method we used is shown a little further down.

Click the thumbnail below to see some of the Do's and Do Not's of building with BCI floor joists including max hole sizes that you should make in a joist.
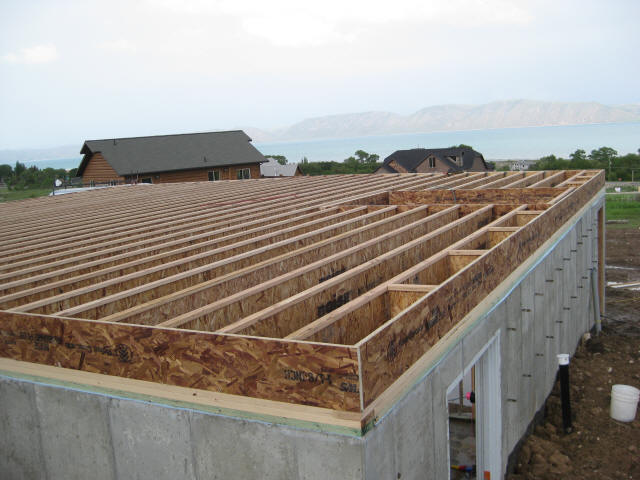
1 1/8" rimboard was installed around the perimeter of the framed floor. The thickness of the rimboard must be accounted for when sliding the joists into place so that you leave room for the rim board. If it's done right, the rimboard, foundation plates, and outside of the foundation will be flush. This will allow you to overlap the sheeting later on.
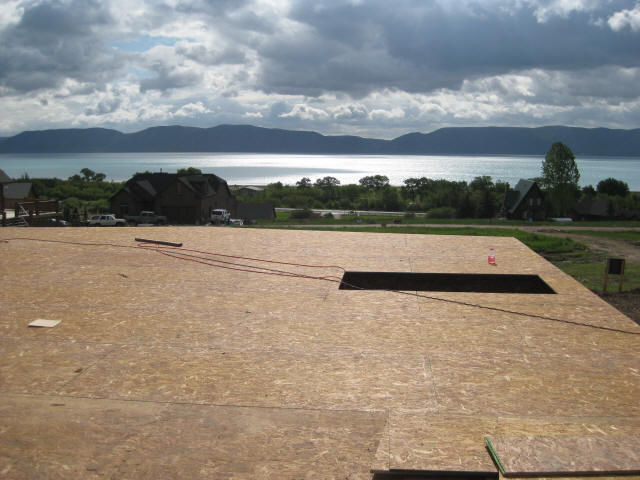
The picture above shows the subfloor sheeting on our cabin floor. We used 3/4" T&G OSB for the subfloor. The 4x8' sheets should land on the joists and should be staggered from one row to another..in other words, if you start with a full sheet on one row, the next row you should start with a half sheet such that the joints don't all end up on the same joists.
Construction adhesive (a full 1/4-in bead) should be applied on every joist before the sheeting in dropped and nailed on. In some cases it helps to use a sledge hammer to knock the sheets into place and to get the T&G to fully seat. Of course you'll want to use a block of wood with the sledge to protect the edge of the tongue and groove. In humid climates you can leave 1/8-in spacing between the sheets to allow for expansion. When framing a wooden floor, the typical nailing schedule for sheathing is 8d nails 6 in. o.c. around the perimeter of the building and at the joints between the sheets and 12 in o.c. in the field (middle of the sheets). It's best to nail the sheets soon after laying them, especially in hot weather, to prevent the glue from drying out before the sheet if pulled fast to the joist. It is recommended that you use ring-shank nails so they stay firmly secured in the joists...this will also reduce squeaky floors. Some people go as far as using screws to prevent floor squeaking. If using joist hangers in your project, be sure to put a generous amount of construction adhesive in the hanger before setting the joist in the hanger.
Back to top - Wooden Floor Framing
Framing Second Floor (Rough Cut Beams/Floor)