STEP 3: Installing Solar Panels on Metal Roof
Installing solar panels on a standing seam metal roof is quite easy compared to a shingle roof. On a shingle roof panels are typically mounted to rails that are then lag bolted through the roof where they must hit into the trusses in the attic. This is a bit more time consuming and there is always a concern with punching a lot of new holes through your roof and making sure you don't create any water leaks.
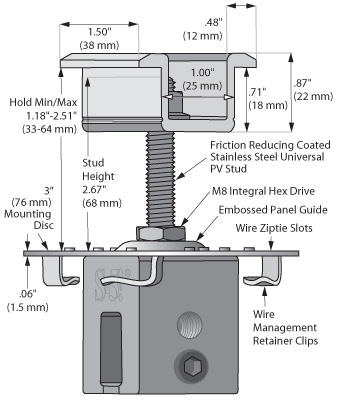
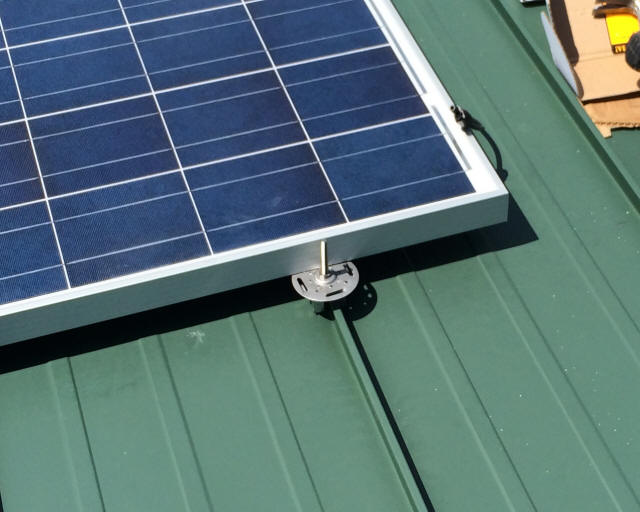
For the standing seam metal roof we found a bracket system designed specifically for mounting solar panels and they work amazingly well. The company is called S-5!. They make a wide variety of brackets for attaching to metal roofs. See www.s-5.com for details on their solar panel brackets. There were two types of brackets that we used. The first is shown in diagram A below. These are used in the middle of the panel array and sandwich two panels. The second type of bracket is shown in diagram B below. These are used for the outside edges of the panels. Each solar panel ends of with 4 brackets holding it in place.
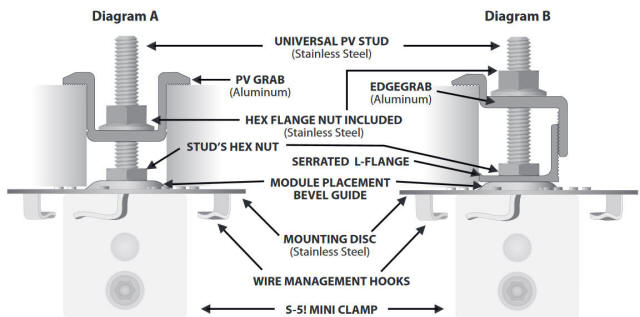
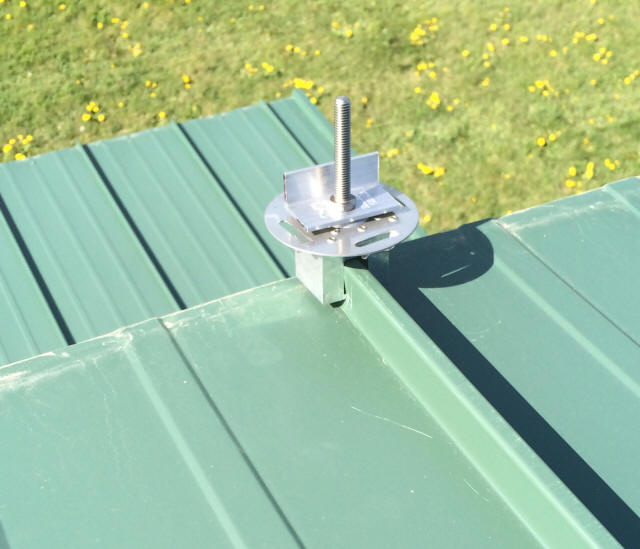
We started at the lower end of the roof first with edge grab brackets. Set screws are driven into the standing seam to lock the brackets onto the metal roof. With this method of attachment there are no new penetrations made in the roof that could cause leaks.
After the bottom row of panels were installed we worked our way up. The panels have two wires on the back that are 3-4ft long and are labeled "+" and "-' and are keyed so that "+" will only plug into a "-" cable. As you install the panels you must remember what your solar string design is and connect one panel to the next as you install. The picture below shows some of the brackets holding between panels. Using this bracket system keeps the panels at a very low profile on your roof which is nice as well.
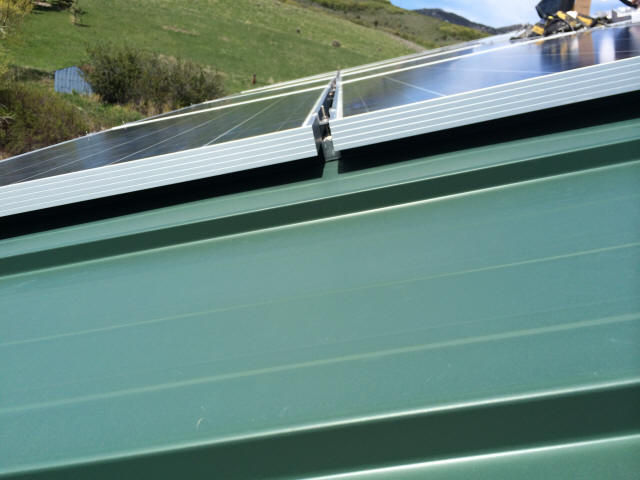
The picture below shows a middle bracket prior to clamping the top bracket on and also shows one of the connecting wires for the next panel.
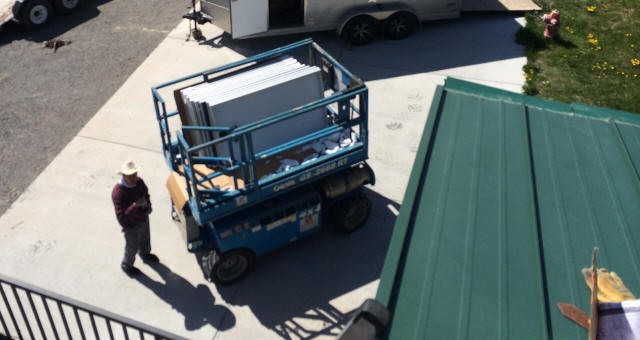
If you are putting a lot of solar panels on your roof a lift like this one came in very handy. I think we rented it for $80 for an entire day and it saved us a lot of hassle in getting 45 panels up on our roof. The panels weighed 43lbs each but they are pretty awkward in size to carry up a ladder. Dropping or damaging one panel could cost you more than a lift. If its an option, I'd recommend it.
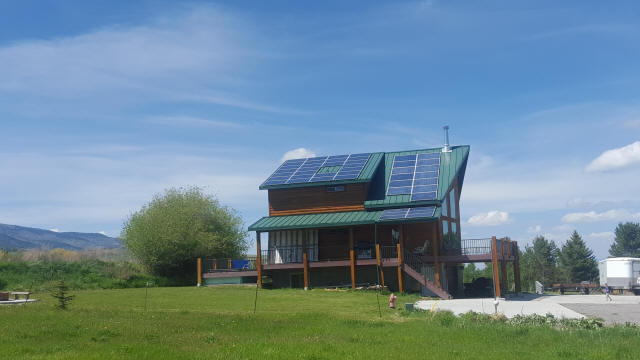
Once we got going on the panel install we had the upper roof installed in about half a day. The remaining panels were installed in another half a day. I'm not sure how long a shingle roof install takes but to install 45 panels in about 8hrs with a couple guys the first time seemed pretty good. The bracket system was really the key in my opinion.
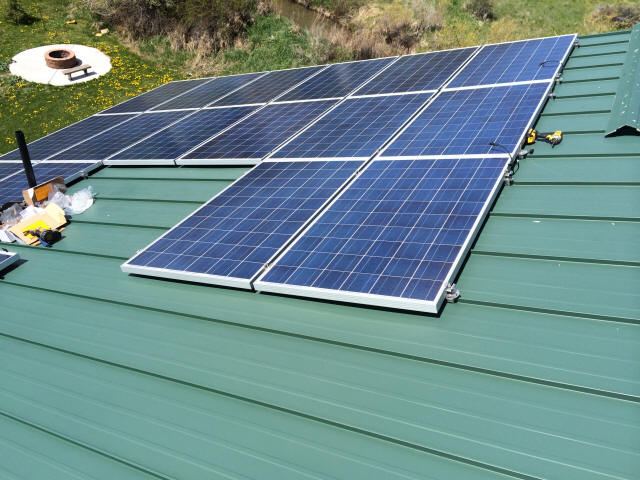
Another pic of the solar panels from the top of the upper roof.
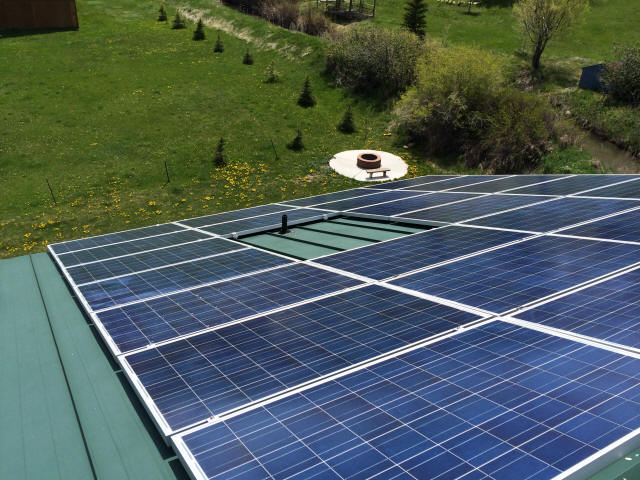
The picture below shows that final product. As mentioned previously, we ran 10AWG PV conductors from each of the strings into the attic through the ridge vent on the roof and through the soffit for the bottom string. Once into the attic we had junction boxes to transition to standard 10AWG THWN wire that ran down to the inverters in the garage.
STEP 1: Solar Power - Do the numbers make sense?
STEP 2: Designing Your Own Solar Power System
STEP 3: Installing Solar Panels on Metal Roof
STEP 4: Connecting Solar Inverters