STEP 3: Staining and Installing Hardwood Stair Treads
Staining and varnishing hardwood treads prior to installation is recommended, especially in this case where we have stone or tile risers. We purchased 11.5-in x 48-in unfinished red oak stair treads from Lowes for about $30 each. Treads should be laid out, sanded if needed, and cleaned prior to applying stain. Wiping the treads with a cloth and mineral spirits prior is staining is recommended so that the stain will soak in more consistently.
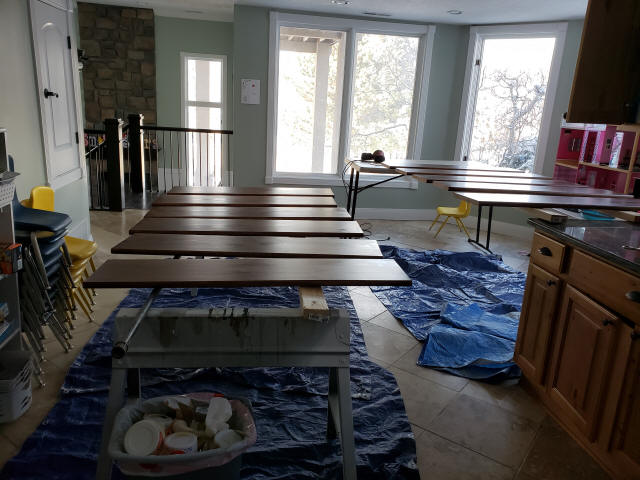
We applied two coats of Minwax oil-based stain (Early American 230) and then applied two coats of Minwax Fast-Drying Polyurethane (Clear Satin). Once the treads are stained and dried it's time to cut and install them. It is important to have a stair tread measuring tool to measure and cut each tread. Search Amazon for "Stair tread layout tool" and you'll find several options from $60 to $100. I made my own stair template tool from scratch. Once you scribe the layout onto a finished tread, use a compound miter saw to cut each stair tread. Dryfit the tread then apply a thick bead of construction adhesive on the tread support as shown below.
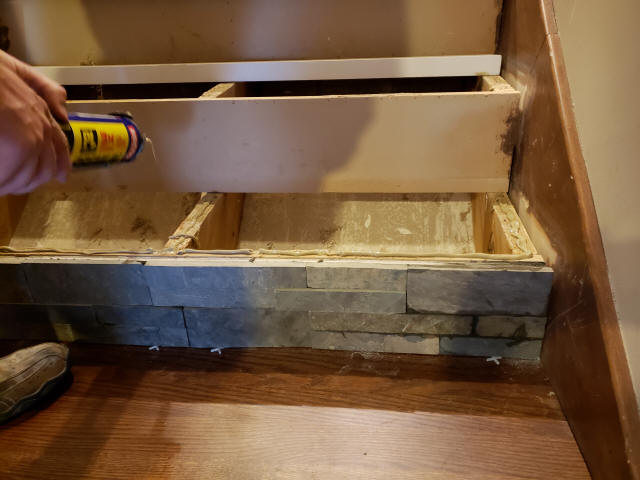
Insert a small spacer betwen the next riser and the back of the stair tread to get the desired stair tread nose overhang. We ended up using a 1/2" spacer. Once the next riser has backerboard and stone applied it will cover the gap.
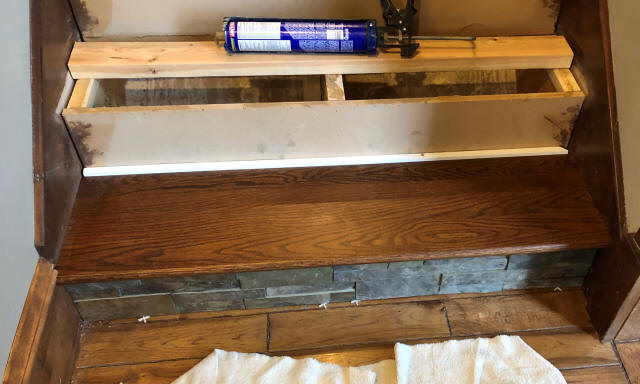
Nail the treads in place with 2" or longer finish nails and an air nailer. Once the glue dries the stairs will be solid. Now continue these same steps and work your way to the top of the staircase. The first couple treads take the longest and then things start moving much faster.

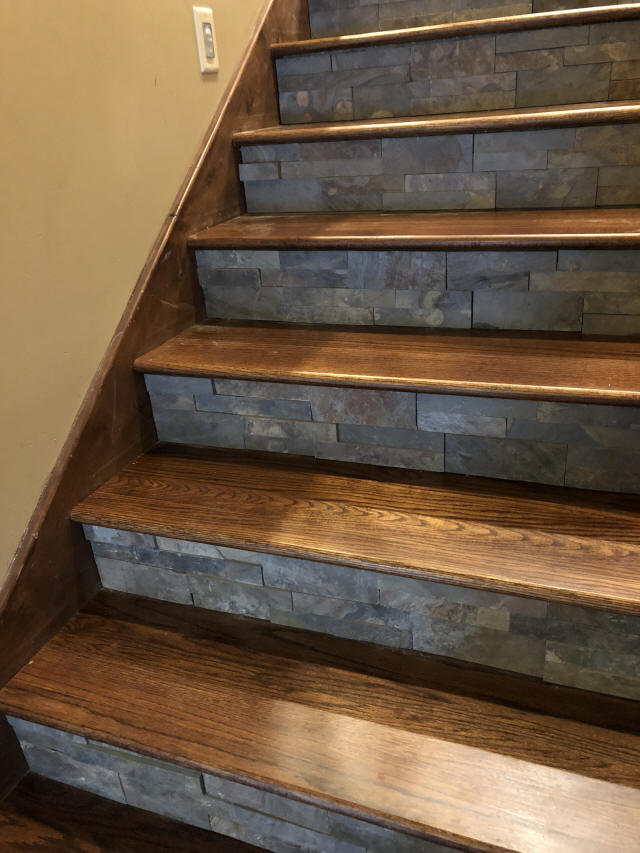
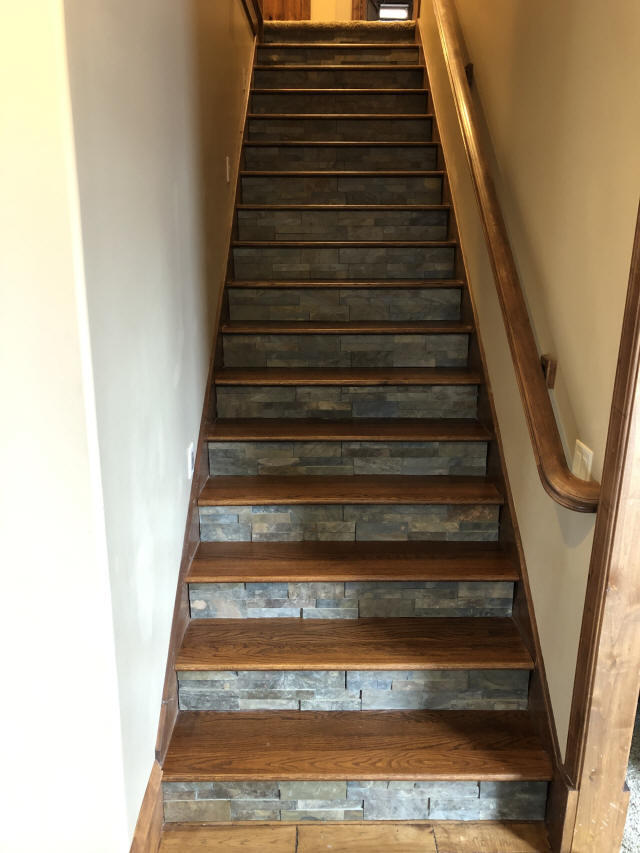
Here's a few pictures of the finished hardwood staircase with slate stone risers.
STEP 1: Removing Carpeted Stairs
STEP 2: Installing Stone Stair Risers
STEP 3: Staining and Installing Hardwood Stair Treads