How to Make Shower Deck Mud
Building your own shower floor from scratch requires shower deck mud, also referred to as dry pack mortar. Deck mud is made from portland cement, sand, and water. The mixture should be approximately 1 part cement to 5 parts sand but anywhere for 4 to 6 parts sand to 1 part cement is acceptable.
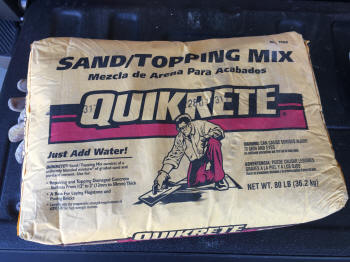
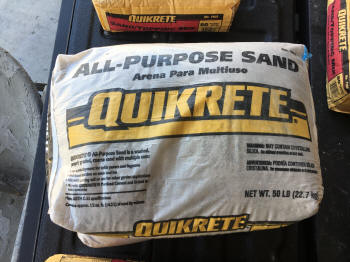
The easiest way I've found to create the deck mud mixture is to buy Quikrete Sand/Topping mix and all-purpose sand from Lowes shown above. The Sand/Topping mix has a 3:1 mixture so for an 80lb bag you just add 40lbs of sand to get a 5:1 mixture or 20lbs of sand to give you a 4:1 mixture. I usually mix one bag sand/topping mix with a half bag of sand (25lbs) to make things easy and have had good luck with that.
Be very careful with how much water you add to the deck mud as you mix it up. It's referred to as dry-pack mortar for a reason. Do not add water like you are mixing concrete. If the mud is too wet it will be harder to work with and level in your shower. More importantly too much water will cause the deck mud to shrink when it dries and floor will not be as strong is it should be. To see if you've mixed the correct amount of water, make a snowball out of the deck mud and it should hold its shape but squeezing the ball should make it fall apart. The mixture should be damp but squeezing it should not cause water to drip out.
Once the deck mud is installed in your shower and sloped you should firmly pack the deck mud with a 2x4 or heavy trowel. The harder you pack it down the more solid the floor will be when it dries. Let the mixture dry at least 24 hrs before getting on to the next step of the shower project. Unless time is pressing, I like to wait until the color completely changes and you can tell it is 100% dry. This can take several days depending on the thickness of your deck mud. After the mud dries there will be some loose sand on the surface. This is normal. Sweep it or vacuum the surface once but don't continue to scrub and clean the surface because you'll never be able to stop.
Step 2: How to Replace a Shower Drain
Step 3: How to Make Shower Deck Mud
Step 4: How to Build a Shower Floor 1 (Curb and Pre-slope)
Step 5: How to Build a Shower Floor 2 (Liner, Drain, Final Slope)
Step 6: How to Install Shower Backerboard
Step 7: How to Build a Waterproof Shower Bench
Step 8: How to Tile Shower Floor
Step 9: How to Tile and Grout Shower Walls